
Android’s Developer Options menu is a treasure trove of advanced features, offering granular control over device behavior and unlocking a wide range of customization possibilities. From tweaking animations and debugging apps to enabling USB debugging for development purposes, the Developer Options menu empowers users to tailor their Android experience far beyond the standard settings. This guide serves as a comprehensive resource for experienced users seeking to unlock and navigate the Developer Options on their Android devices, providing step-by-step instructions and insights into the various functionalities within.
Whether you’re an aspiring Android developer, a power user seeking to fine-tune performance, or simply curious about the hidden potential within your device, understanding how to access and utilize the Developer Options is essential. This article will detail the process for enabling Developer Options across different Android versions and manufacturers, ensuring accessibility for a broad range of users. We’ll also cover important considerations and potential risks associated with modifying these settings, emphasizing responsible usage and a clear understanding of each option’s impact.
Open the Settings App on Your Android Device
The first step to enabling Developer Options is to open the Settings app on your Android device. There are several ways to access the Settings app depending on your device’s launcher and Android version.
Typically, you can find the Settings app by swiping down from the top of your screen to open the notification shade and then tapping the gear icon located in the top right or left corner. Alternatively, you can find the Settings app icon within your app drawer. The Settings app icon typically resembles a gear or cogwheel.
Once you locate the Settings app icon, simply tap on it to launch the app. The Settings app is the central hub for managing various configurations and preferences on your Android device.
Navigate to the “About Phone” Section
Once you’ve opened the Settings app, you’ll need to locate the “About Phone” section. The exact location of this section might vary slightly depending on your Android device’s manufacturer and Android version. However, it’s typically found towards the bottom of the Settings menu.
Here are some common locations for “About Phone”:
- Directly in the main Settings menu: You might see “About Phone” listed as a main option within the Settings app.
- Within a “System” or “General Management” category: Some devices group “About Phone” under a broader category like “System” or “General Management.” Look for one of these headings in the Settings menu and tap on it. “About Phone” should be located within.
Important Note: If you’re having trouble finding “About Phone,” use the search function within the Settings app. Most Android devices offer a search bar at the top of the Settings menu. Typing in “About Phone” will usually yield the correct result, even if it’s nested within another menu.
Find the “Build Number” and Tap It Repeatedly
Locate the “Build Number” entry within the “About Phone” settings. This option displays information about your Android build, such as the software version and kernel version. The precise location of the “Build Number” might vary slightly depending on your device’s manufacturer and Android version. It’s usually found near other system information.
Once you’ve found it, begin tapping the “Build Number” repeatedly. You’ll see a toast notification appear after a few taps, indicating how many more taps are needed to activate Developer Options. Continue tapping until the notification confirms that Developer Options are enabled.
Enter Your PIN or Password to Confirm
Once you have tapped the Build Number the required number of times, a small toast notification will appear, stating “You are now a developer!” However, to fully enable and access the Developer Options, you’ll need to confirm your identity for security reasons. Your device will prompt you to enter your screen lock PIN, pattern, or password.
This security measure ensures that only authorized users with access to the device can modify these potentially sensitive settings. It prevents accidental changes to developer options which could affect the performance and stability of your Android device.
Enter your PIN, pattern, or password as requested. Upon successful authentication, the Developer Options will be fully enabled and accessible within your device’s Settings menu. You will not need to repeat this process unless you perform a factory reset on your device.
Access Developer Options in the Settings Menu
Once you’ve successfully entered your PIN or password, you’ve officially unlocked Developer Options. These options are typically hidden from regular users to prevent accidental changes to system settings. Now, you can access these powerful tools.
The location of the Developer Options may vary slightly depending on your Android version and device manufacturer. Commonly, you’ll find them within the main Settings menu.
Option 1: Direct Access
On some devices, Developer Options will appear directly in the main Settings list after being unlocked. Simply scroll down the list to find and select “Developer options”.
Option 2: Nested within “System”
On other devices, you may need to navigate to “System” or “System & updates” within the Settings menu. Once inside the “System” menu, look for “Developer options.” This additional step keeps the developer settings slightly more hidden, even after being unlocked.
Now, you have access to a range of advanced settings, including USB debugging, changing animation speeds, and more.
Common Uses for Developer Options
Android’s Developer Options offer a powerful set of tools primarily intended for software developers and advanced users. These options allow you to customize various aspects of your device’s behavior, enhance its performance, and connect it to other devices for development purposes. While they can significantly improve your experience, it’s crucial to use them with caution.
Common uses include tweaking animations, enabling USB debugging, simulating app stresses, and gaining insights into system processes. Whether you’re an app developer testing your latest creation or a power user looking to fine-tune your Android experience, understanding and utilizing these options can unlock a new level of control over your device.
Customize Animations and Transitions for a Smoother Experience
Developer options allow you to fine-tune animations and transitions, leading to a perceived performance boost. These settings control the speed of window and activity transitions, as well as the duration of animator and transition animations.
Window animation scale, Transition animation scale, and Animator duration scale are the key settings here. Each offers a range of speeds, from off (animation disabled) to 10x. Lowering these values makes animations snappier, while increasing them slows them down. Experiment to find the setting that best suits your preferences.
A lower scale results in faster animations, making your phone feel quicker. For a more deliberate visual experience, a higher scale can be used, but this may make the phone feel slower overall.
Enable USB Debugging for Advanced Connectivity
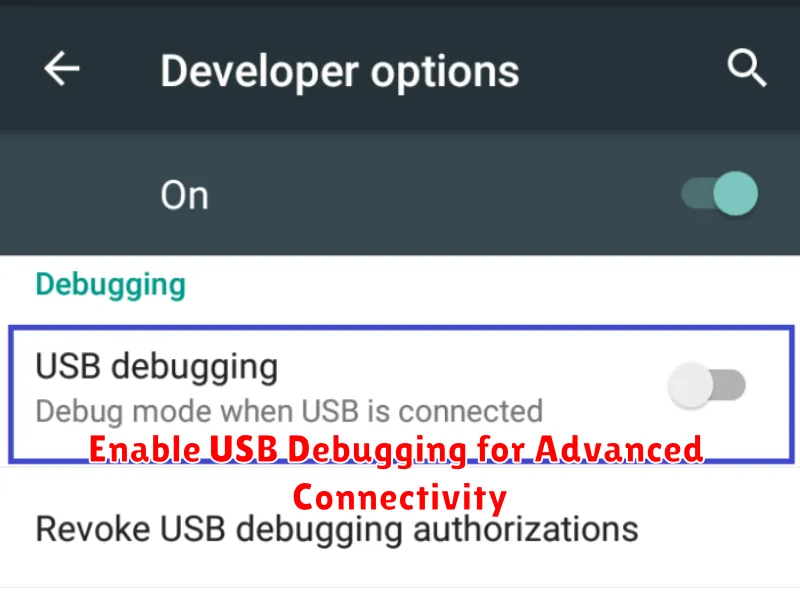
USB Debugging is a crucial tool for advanced users seeking greater control over their Android devices. It establishes a direct connection between your phone and a computer, enabling a range of powerful functionalities.
Primarily, USB debugging is essential for software development and testing. It allows developers to push code changes directly to their devices and debug apps in real-time. This streamlined workflow speeds up the development process and aids in identifying and resolving issues quickly.
Beyond development, USB debugging allows for various advanced operations. It’s necessary for tools like the Android Debug Bridge (ADB), which provides command-line access to the device. ADB enables tasks like file transfers, system-level commands, and app backups. This level of control can be invaluable for troubleshooting, customizing, and managing your device.
Enabling USB Debugging is straightforward. After unlocking Developer Options, simply locate the “USB Debugging” toggle and activate it. A prompt may appear requesting authorization, which you should confirm. Remember to deactivate USB Debugging when not in use for security reasons.
Debugging Apps and Monitoring Performance
Developer Options provides essential tools for debugging applications and monitoring system performance. Enable “Show CPU usage” to overlay real-time CPU statistics on your screen, allowing you to identify performance bottlenecks. This overlay displays active processes and their respective CPU consumption.
“GPU profiling” offers visual insights into graphics rendering performance. Enabling this option displays a graph indicating GPU load, helping developers optimize their apps for smoother graphics. Select from different visualization modes to understand rendering behavior.
For more in-depth analysis, “Profile GPU rendering” provides detailed performance data. This feature records rendering time for each frame, facilitating identification of performance issues in specific UI elements. The recorded data can be analyzed to fine-tune application graphics and optimize overall responsiveness.
Warning: Use Developer Options with Caution
While Developer Options offer valuable tools for advanced users, it’s crucial to proceed with caution. Modifying these settings without a full understanding of their impact can lead to unexpected behavior and potentially compromise your device’s stability and security.
Avoid changing settings you don’t understand. Many of the options within Developer Options are intended for developers debugging apps and system functionality. Altering these settings arbitrarily can lead to performance issues, app crashes, or even data loss.
Be mindful of security implications. Some Developer Options, such as USB debugging, can pose security risks if enabled while connected to untrusted computers or networks. Ensure you understand the potential vulnerabilities before activating such settings.
If you encounter problems after modifying Developer Options, revert any changes you’ve made. If issues persist, consider resetting your device to its factory settings as a last resort. Remember to back up important data before performing a factory reset.